Radarcape
- Update to the latest firmware — Install the latest firmware available for your
device via Settings → Software Maintenance → Radarcape Software Update,
especially if you are running
251210.1100.02. See Jetvision's release notes and update instructions for the current version and any required prerequisite patches. - Always check the GPS fix — Make sure your Radarcape or Air!Squitter has a good, stable GPS fix. Check the GPS/GNSS status and the OpenSky feeder logs in the web interface if feeding is not working. The legacy SSH workaround below is only for older Radarcapes; it does not apply to newer Radarcapes or Air!Squitter devices. Check the GPS status and resolve antenna or reception problems even when using the legacy workaround.
Option 1: Native OpenSky Feeding Recommended — Firmware v2+ (since 2017)
Since major release 2 of the Radarcape firmware (2017), OpenSky feeding is supported natively via the Radarcape web interface — no SSH or manual installation needed.
Walkthrough
In the Radarcape web interface, navigate to Settings → Feeder Settings and open the OpenSky Network tab. Enable feeding by checking Feeding enabled.
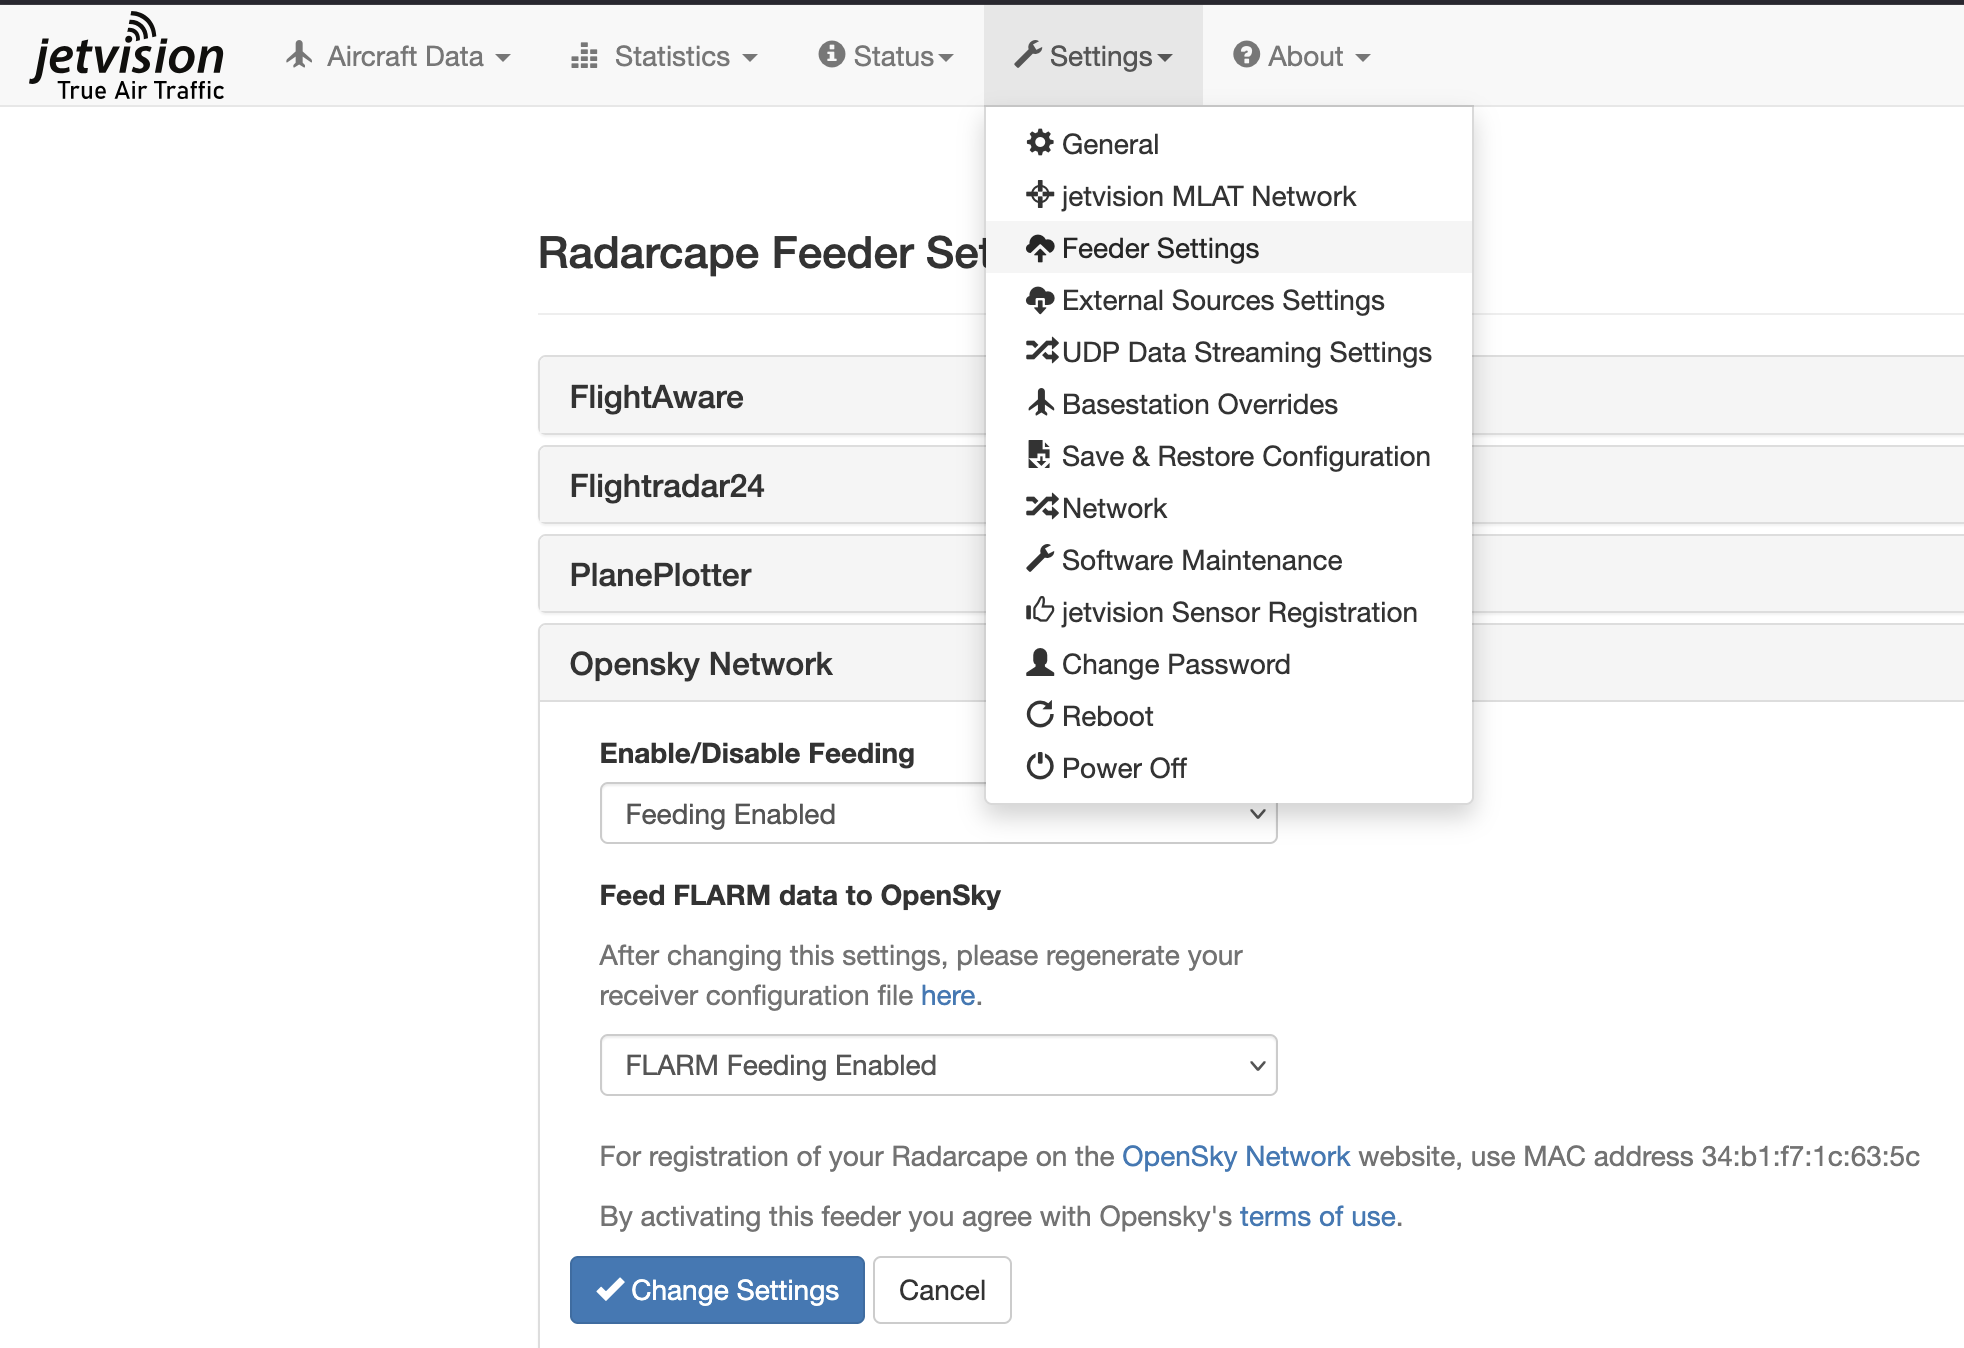
Next, go to Status → OpenSky Network to view the feeder logs and confirm that feeding is active.
On this status page, note down the serial number that has been uniquely generated for your Radarcape — you will need it in the next step.
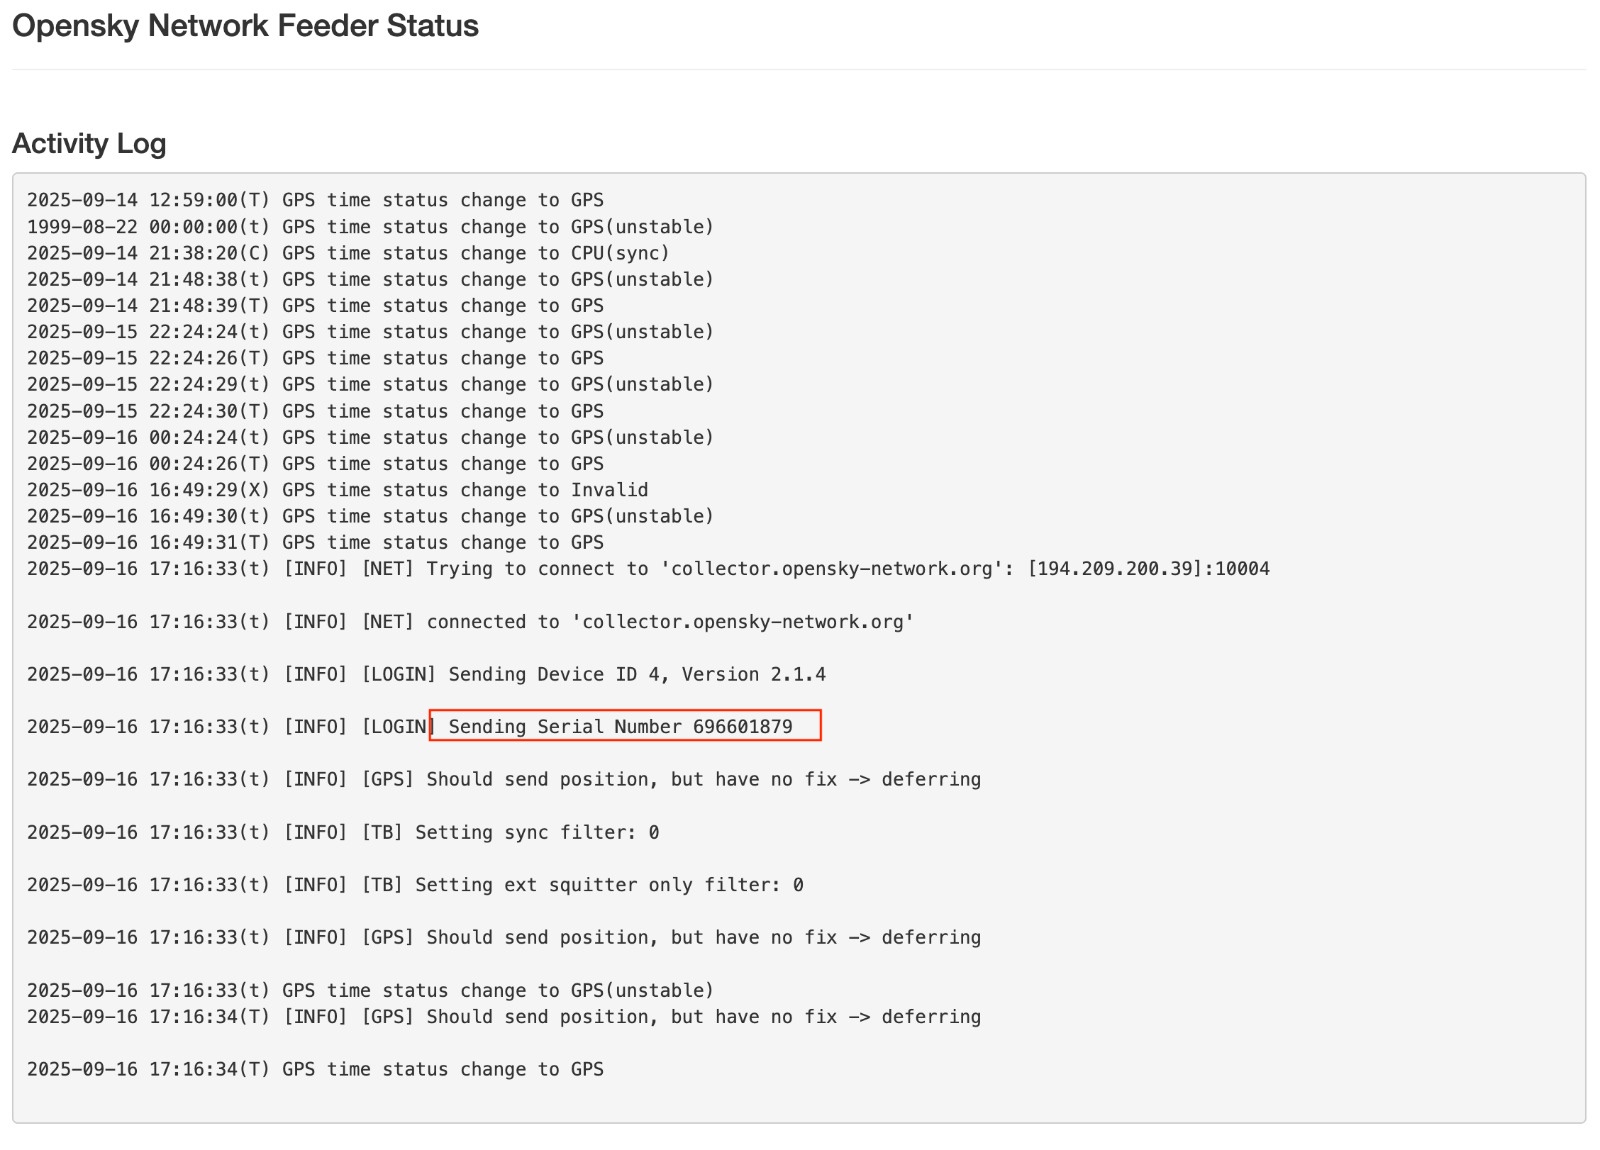
Finally, to claim your Radarcape and associate it with your OpenSky account, go to Register a Radarcape Receiver. Enter your antenna location and the serial number you noted down. Your receiver will then appear under My Sensors in your account.
Option 2: Legacy Installation via SSH Older Radarcapes Only
These instructions apply only to older Radarcapes, including the GPS-related feeder workaround on those devices. They do not apply to newer Radarcapes or Air!Squitter devices, which should use the built-in OpenSky feeder. Always check that the GPS fix is good and stable, and resolve GPS reception problems.
Before installing, create an account and register your device under Register a Radarcape Receiver. Connect via SSH (e.g. using PuTTY on Windows), then identify your Linux kernel version:
uname -a
Versions up to 3.8 run Ångström Linux. Version 4.1 and newer run Debian Linux.
Ångström Linux
wget --no-check-certificate https://opensky-network.org/files/firmware/openskyd_latest_armv7a-vfp-neon.opk
opkg install openskyd_latest_armv7a-vfp-neon.opk
Debian Linux
wget --no-check-certificate https://opensky-network.org/files/firmware/openskyd_latest_armhf.deb
dpkg -i openskyd_latest_armhf.deb